Some time ago I had decided to set up a simple, yet time proven, macro shoot set up. I had been told about a professional photographer in N.Y.C. that used sheets of glass in the 80’s as we use layers in Photoshop today. Without seeing her set up for my self, an idea for a fun way of making backgrounds in macro photography entered my mind and has never left. I will say that I have played with macro photography a lot and have shot horizontally and vertical in the past.
The troubles with my macro photography that I have come across in the past is both holding the item to be photographed and making a nice looking background in the macro image. I have sent numerous designs onto white seamless using flashes with varied results. I all too often resort to using either an all white or an all black background, and that can get boring. I made amends with my not-so-successful history of macro, and ventured into troubled waters once more.
First of all I need to explain the parts and pieces that were involved. I purchased a small sheet of plexiglass at the local hardware store. I made sure to get one about three quaters of one inch thick so that it would not bend under the weight.


I also have a Stroboframe “Lepp 2” dual flash macro bracket. It is simply a bracket that mounts on the bottom of your camera, and your tripod, with two adjustable arms designed to hold flash heads where you need them to be. You might notice that these brackets come with mini ball heads on each of the two arms for holding the flash heads.
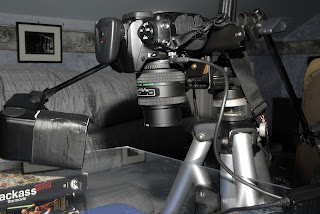
I opted to remove them, in order to hold my EBay remote flash triggers. I could have slipped the triggers onto the ball heads but the flash heads were tall enough without the mini ball heads attached, and the flash heads are designed to rotate in as many positions as the mini ball heads will.
Then I opted to install a Nikon MC-30 remote shutter release onto the camera. When you are shooting up close macro shots any camera shake results in a blurry image. Firing the camera remotely makes good sense.
I used two of my Nikon SB-26’s flash heads with my home made girded snoots to light two separate things. One flash would light my subject with a clear hard light from the side. This would illuminate any detail of the subject. The second flash had a blue gel on it, and only lit the bandanna.
I started in with ironing a solid blue canvas bandana that I have had stored away. Ironing is not one of my better trades, but I was in the military, so I know my way around the iron itself. I placed the canvas bandana onto a T.V. tray, and stacked VCR tapes on the left and the right of the bandanna. I did this to hold the plexiglass up off of the bandanna, in order to help “blow it out of focus”. I use the VCR tapes as stacking blocks often as I already own them, and they are all the same size as each other.
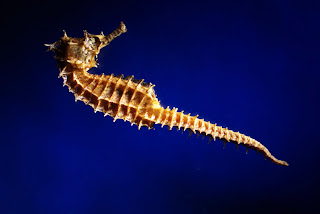
Blowing the bandanna out of focus was important. I wanted the blue to remind the viewer of an ocean type environment in which the sea horse would be most likely spotted in. Removing the detail of the weaving (and wrinkles) of the cloth was important as to not give away what it actually was.
I knew that Macro lenses, set to a shallow depth of view, will help to throw stuff out of focus by themselves but I wanted the extra separation between the objects and the blue backdrop for two reasons. The second reason is that I wanted to light the blue bandanna with a flash, but not have this be too obvious. The flash would bounce or reflect off of the clear plexiglass and give it away unless I raised the plexiglass up and stuck the “blue gelled” flash underneath of it.
Next I turned on the blue gelled flash, and got it set to where I liked its’ intensity and its’ “roll off of spillage” around the edges. I then placed my subject into the frame. Then I started working the second flash, in tandem with the first flash, until I liked the mix of the two. This second flash took some time as I needed it to help show the detail of the subject as well as light the subject overall.
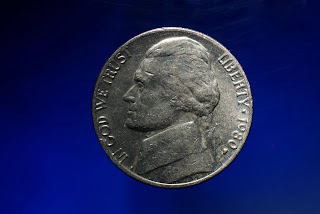
I shot the nickel as to show you all the size of the overall frame. You can shoot this set up with any sized objects. You can also get in very close, and show amazing surface detail at the same time!
No comments:
Post a Comment