Monday, September 29, 2008

Foreground foreplay.

I have been so busy lately that I have had little time to even think about what to write about this past week. So, I decided to not think about it at all, but instead, to review some of my recent images to come up with a good idea to expand on. It didn't take very long.

I would love to talk about using available foregrounds in order to make more interesting images. Foregrounds can help to lead a viewers eyes into an image as well as help to frame an image. I will freely admit that I usually am so excited when I stumble across an object to photograph that I simply center the subject and then shoot. This is not a bad thing, per see, but the resulting image is nice, and only nice. It usually lacks some "pop", or any character at all.

Using foreground in our images can add depth to a scene and even make the viewer feel as if they are standing in the image itself, taking in the view. We can relate moods to viewers as well, by simply using some sort of foreground in our images. For example, colorful trees framing in a lake might suggest that an image was shot in the fall, or a rock jetting out of the water of a running brook might suggest some level of danger. I like the shots of low tide, with a clam digger out on the mud flats, at the foreground or bottom of the images. That is a classic use of foreground, as the viewer knows that it is low tide somewhere by the ocean.

Using plants, trees, or other objects to frame a subject creates more for the viewer to look at, and allows for some "travel" for their eyes. The longer you can hold a viewer in one of your images, the better. The human eye travels around images in certain patterns of travel, and learning these patterns and then applying them (via) using foreground and framing techniques will only enhance your images. Some of the usual patterns of travel for our eyes are from left to right, from what is in focus to what is out of focus, from patterns to blur, contrast to no contrast, and so on. Think as the master painters used to, and you will start getting images with depth and with interesting stories planted within them.


The images in this blog are almost just snap shots. As I was photographing the lighthouse and the lobster boat, I started just centering them and clicking away. It was not until I later looked at the images in the camera that I noticed that they looked rather dull and uninteresting.


I quickly thought about ways to improve them. I took a look at what I had around me to work with. For the lighthouse image, I noticed the interesting trees and lawn that was right next door to the rock that I had been standing on.


The grass in front of the lobster boat was there all along, I was simply trying hard to make sure that it wasn't in any of my images. When I finally bent down to take a look at the boat through the grass and weeds, the finished shot appeared.


Thanks for reading! Please feel free to subscribe today, so that you never miss one of the up and coming blog topics!

Monday, September 15, 2008

Stock images worth money


As of late I have been so very busy that the time allocated for shooting stock images has shrunk to almost zero. I do enjoy the mindset of being busy, but I also enjoy aimlessly wandering around with my camera. Some questions that often arise (from others and myself) about the world of stock photography are as follows. What images are good for stock website sales? What makes for a popular stock image versus a profitable stock image? Which website should I use to market and sell my stock images? How much can you plan on making with stock photography websites?
To begin, let me say that stock image websites look at your submitted images very closely. They quickly decide if the image is actually marketable, well for their site anyway. If it passes that first test then they blow it up very large to see if there is too much noise in the image. They also look for the "tell tale" sensor dots caused by a dirty sensor on your digital camera. The submitted image must be a certain size, too, usually about 2 to 4 Megs worth of information is required. Each of the different stock websites list their own requirements. Make sure that you try hard to resist over editing, or putting vignettes on your submitted images as they frown on that. The stock websites feel that the folks that purchase the images are the ones that should decide weather to put (or not put) a vingette on an image that they have purchased. That's O.K., as it means less work for us.
O.K., so you took a great image that you believe is marketable in the stock industry. Before submitting it to one of the many stock websites, you must do some quick work in Photoshop. First, color correct the digital images that you would like to upload to a stock website. All digital images need to be color corrected to some degree, without exception. Color correction is a concept that I could not fully grasp until I watched Vincent Versace doing it in one of his famous Photoshop tutorials. You can find these tutorials here.

Here is the difference color correction can make.


Next, perhaps a fast crop or image re-size is needed. I like to apply a little noise reduction before I upload an image. This way it will be less likely to fail the first time out. There is software that I highly recommended in order to remove noise. The one that I have found to be the fastest, and the best in practice, is "Noise Ninja". You can find it here. I was turned on to Noise Ninja by an image submitting "team" for one of the large stock websites.
Then you are ready to upload your new stock ready image to a world wide website. Let's go through what that entails. First there is sighing up, or joining one of these monsters. You simply request membership under the title of a "contributing photographer". Fill out each of the blanks that are provided. They must know who you are in order to one day send you a check.
Most sites ask that you submit several images to them, for review, in order to see if your work is up to their standards. Do not worry about this, consider it a great test, and a challenge! Most of the time they like what they see, if they are truly stock images, and within several days the "congratulatory" email comes in. Then it is time to flood the "Web-Waves" by uploading your stock images to this website.
These images go through the same examination, and when they are accepted they will send a separate email to notify you. Then, the accepted images go into your portfolio, located on the stock website. After you have "logged in and pass worded in", you can review your stock images in your new portfolio. However, I have purposely skipped a step of the process.
I wanted you to get excited before I added more work. You must decide on one more thing before you even start the next process. That is how to market and sell the stock images that you have worked so hard on. Do you want to submit the images "exclusively" on only one stock website, or submit them onto many different stock websites? My advice is to choose a popular stock website, and then submit your images exclusively to that one site. You get paid more with each download with "exclusive rights", because the purchaser knows that it is an unique image found only on that one website. Placing the same images on several different stock sites may be your way to go, too, as to market it to the most folks as possible. You will get allot less per upload that way, but perhaps more uploads all together.
As the processes of uploading your images unfold, you will be required to title the images, give a description of the images, and type out some "Keywords" that define them, or that you might type into a search if you were to locate your image. An example for some keywords for the dog image (above) might be "fetch, health, exercise, ocean, play" and so on. You will also be asked to select several categories for your images. For the dog image above I might choose "pets", next I would try "health and fitness" and last of all I might select "animals". These help folks to find your image among the millions and millions of different stock images that these websites have in their inventory. Be creative and thorough with the "key wording". Pretend that you, yourself, might be the one searching for the exact same image that you are typing "keywords" for. Also, it helps to think of the current trends while "key wording". For example, if your image is of a wind mill power generating farm, you might use the words "green, alternative, energy, and source".
The last thing to do is wait. Most images sell between the hours of business, Monday through Friday, as businesses are open and looking to use the images that you have supplied. They will use them for many reasons. They might need them for a presentation, a handout, or even for a project that will be seen by lots of people. If your image is of stock quality, it will start selling.
This brings us to the next idea. That idea is "usage rights". What is the image that you up-loaded going to be allowed to be used for? You can check off the different "usage rights" as you upload and key word the different images that you want to sell. I like to allow the stock websites to do as much as possible with my images, as to get the most money out of them. I also allow people to buy the image out right, if they so desire.
Last of all I would like to share with you the potentials of stock image selling. The "hot markets" are reportedly the medical fields and the business world. Images of persons working in the hospitals of the world, or perhaps on ambulances are gold. That is what I am led to believe. Also, unique images of an offices' cube farm, or "suits" on escalators are often currently in demand. I stick to what I know. I am still a beginner at this world of stock photography, but my images are doing O.K. I love music, so that is what I photograph. My advice would to start with what you know the most about, and what you are passionate about. Photograph the dickens out of those topics. After you get your feet wet, move on to the more popular, in demand stocks.
Their are folks that make thousands and thousands of dollars every year in stock photography. They sell their images on stock image websites, and they have done very well at it. To see some of the most selling images on a website, set the search tab to "most popular" after you have typed in the desired topic of a search. They will list in order from most downloaded to least downloaded. Simply spending time looking at these sorts of ideas can actually hone your skills, and save you years of time and work, by letting you know what direction to move towards.
Most of all, have some fun!
See you next time! Feel free to subscribe to my blog! That way you will not miss anything!

Sunday, September 7, 2008

More ideas for marketing yourself.

Welcome back, all.

I have been stretching my imagination as to new and exciting ways to get my message out there. The ideas have been coming, but I find myself tossing most out. The ones that seem to pass my test of time are actually in the works. I am dying to share with you both these ideas, and how I plan on executing them.

To begin, I must send you to "Weekly Photo Tips" for a second. Scroll down to the "A couple from the Photoshop Boys..." post, and enjoy the one about unique business cards. The idea shared here is brilliant, and I will take advantage of this free idea.

Next, is an idea that came to mind last year. As a born again Christian, I love to think that I am helping others, and I try hard to do this. At Christmas time, last year, I thought about a photo shoot for local families, that I called "Santa at the studio". The idea calls for a simple North Pole set, with Santa, and you know the rest. The angle, here, is to have it be a "win-win" situation, as to try to help people. Well, if they can have a picture of their children for free, some hot chocolate and donuts, than they might be willing to donate to a local not for profit cause.

So, I will be going to a local store to ask for a donation of free CD's to burn the images onto. I will also "hit up" the local coffee, hot chocolate, and donut shop for some donations of delicious "sugar love" creations, and give then them out to the families. Next, I plan to visit the local Wal Mart for a cost reduction on the actual printing of the "Santa at the studio" images.

Why do I feel that the local shops will help? Because, I know they will. If I allow them to hang their banners and such in the studio, then they will give almost anything. I have worked with some local businesses before, and their heart has no bounds when it comes to charities. Name dropping doesn't hurt either, as we all know. Wal Mart is the only one that I am not sure of. I need to explain to them that these customers will be coming in to get their images at a cost reduction, and also most likely Christmas shop. We will see.

The staff needed to pull this off will be coming from the Heartwood College of Art humanities class. Set design, any painting needed, and photography skills are in abundance here, plus I am a student as well as a volunteer at heart. So, with free labor, free supplies, free everything, all we need is to ask for a donation (of any size) to a local cause.

Now, for the learning part, as we get back to the marketing theme of things. I purchased a used book, a long time ago, and it has taught me much about the press, and how to use them for your own marketing cause. It is most about press releases, how to make them, where to send them, what to expect, and the like. Most importantly, it explains exactly how to use the news and media to get a message out to your target audience, for pennies. Using this book, and a little wordsmithing, I plan on getting our "Santa in the studio" message out there. This will be very exciting, as well as the best practice for my next press release concerning my photography business.

More on this later. Today is spent already. Much editing of portfolio images to perform, as well as some homework. I will return soon with some notes from my campaign, what I find out, and some shortcuts for you all; as I come across them!

The book that I found, by the way, is titled "How to get publicity", by William Parkhurst. The copy that I have was written in 1985, so the web is not a part of its' make up. This will be an adventure that I will need to take on my own.

Thanks for the awesome loyalty folks, and stay tuned! Comments and questions are always welcome!

Tuesday, September 2, 2008

Long exposure images.

One of my favorite things to do is long exposure photography. I love to experiment with all sorts of lighting while the shutter is open, to get lots of great, creative images. I'd like to take some time discussing my approach, and share some of my images with you.

First of all, the exposure settings on the camera itself. Since all of the cameras settings relate to one another (f-stop, I.S.O., and shutter speed), lets see what variables we have to play with, and what setting comes first when shooting in no, or low, light. The given, here, is shutter speed. I like to guess how long it will take for me to illuminate the subject, and then I set the shutter speed to match. This is a starting point only, and sometimes it takes a few changes to get it right.

I often choose the "Bulb" setting, but most often with a film camera; using a shutter release cable. Digital cameras are hard to use with the bulb setting, since they have a push button that closes the shutter back up as you take your finger off of it. I like to open the shutter, and then roam around lighting stuff up with a light. I have used tape and small, peanut shaped objects to overcome this obstacle, so please feel free to be creative.

With the shutter speed close to being correct (allowing time to light the subject) I then go ahead and decide on how I am lighting the subject, and then last, what do I want in focus. The I.S.O. determines how well the digital cameras' sensor reacts to the light. You must ask yourself "what type of light are you using, and how much light are you capturing?". I like to use flashlights quite a bit, so I light up a subject with yet another series of "test images" to get it where I want it.

I.S.O. most often gets set to between a 100 to 400 range. 100 speed gives a nice black background, while 400 "takes" the lighting better. A F-stop of between 8 to 16 should work fine for most situations, but adjust it too match what you are shooting. Keep in mind that the shutter speed is the first adjustment to make, and the most critical. All other settings are adjusted, or follow suit, to the length of the shutter speed.

The three settings are tied into each other, so if I raise the I.S.O. too much, I will need to change the F-stop to match. The depth of field is not too important with dark, nighttime photography, if you are lighting objects with a flashlight. This is because as long as the lit subjects are in focus, nothing else (background and the foreground) will even be seen. So, I use the I.S.O. and then the F-stop at the same time to dial in my light sensitivity, but only after the shutter speed has been set.

I should note that the speed at which you move the beam of light up and down the subject adds brightness or darkness too. Even the strength of the beam itself, and the charge of the batteries can alter the overall brightness. Don't be afraid to alter your cameras settings to taste as you go. This is not a wedding. You can take as long as you like, and "chimping" is allowed.


What about long exposure without a direct light source? I like to shoot passing cars on the streets and the interstates. I love the colors and the suggestive nature of movement in the images.


I approach them in much the same way. I get a feel for how long it takes the traffic to move across the frame and then set the shutter speed just a little bit slower that that. Plus, ask yourself how many cars you wish to pass in the frame, as more cars equals more light. Next, I play with the depth of field in my night scene, and set the F-stop to match. Last of all, I shoot some test images in order to dial in the I.S.O. and maybe alter the F-stop too. Make sure that the intensity of the lights on the cars passing by are not too strong or bright in the image, and watch for the background lights that can cause some "road spillage" too. I like some of the light from the traffic to spill onto the road and even light up the signs along the shoulder. But too much spillage of head lights can cause it to look more like daytime instead of the pitch black nighttime.

Have fun but be careful! Make sure that you can be seen by the passing cars! Please do not "hide" on the side of the road. Sometimes I like to let the local authorities know what I am up to, just to avoid a possible shake down. I pop into the police station and inform the dispatcher of my evenings' plans. That is something I would have never done in my youth.

My favorite, and whom I feel is the true master of this sort of creative energy is Chris Becker. He has some great ideas, and if you have not yet looked at his images, then you should check out his "Painting with light" images. The best part about his works are the ideas of subject matter. I like to light every day items too, but he brings a lot of suggestive, provocative energy to the plate. Remember that running through the image will not alter it, as you can not be "seen" by the sensor. Wearing dark clothing can be of some benefit too, but not along a roadside. Hold the flashlight so that it can not be "picked up" in the image, but what the light itself falls on will be in the image. I can't tell you how many images I have had to toss out due to either my flashlights tracer being picked up, or the flash display lighting doing the same.
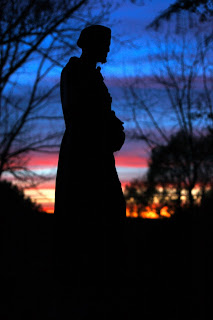
Try using a hard light, versus a soft light. Placing diffusers or make shift snoots onto your light source can add to your technique. Try different types of bulbs too, like a L.E.D. flashlight, or a common battery operated flash light. I like to use a camera flash, held in my hand when lighting large objects. That might need some practice too, as it spills quite a bit.

I mix and match light types and colors too. A nice green or blue can change an images feel and mood. You star trail fans can find ways to keep the shutter open with some easy thinking. Try elastic bands and tiny pebbles, and also Velcro, if tape will not work. I love to set the white balance to the different settings, just to see what colors the different settings will introduce. The sky is the limit!

Please try it out for yourself, and I believe that you will soon be hooked too! Comments and questions welcome, and please subscribe today as I will not go away!

Enjoy!