John Paul Caponigro
Drawing with light
21st century dodging and burning
I have recently had the pleasure of watching yet another life changing masterpiece. The ways in which I used to work so hard to achieve a complex edit or a complex result are now over. Little did I know that it was possible to achieve such incredibly intricate edits to my images by using some easy to understand techniques. Not only has the impossible become possible, but the speed at which to get there has been reduced to mere seconds thanks to John Paul Caponigros’ DVD set titled “Drawing with light”, “21st century dodging and burning”.
John Paul Caponigro has taken a lifetime of photography skills (like dodging and burning) and has come up with a great way to reproduce them using a digital method. However, we are not simply dodging and burning shadows and highlights here. Instead John explains, in detail, just what photography techniques and methods make an image appear to be more three dimensional. He then goes to great lengths showing the viewer how to make these simple edits using some great Photoshop techniques.
This DVD set goes way beyond some simple dodging and burning techniques. John has some great ways of achieving some awesome results. I learned that with each adjustment, in Photoshop, comes an unwanted side effect. For just one quick example, with a boost in saturation comes a boost in contrast. This is perhaps true when performing these functions in the way that I used to do them. Well, unwanted side effects are now a thing of the past in my editing workflow, thanks to “Drawing with light”.
John takes the viewer into a world of editing theory here, and holds our hand the entire time. He explains the theory behind each of his edits, and then he explains how he performs the very edit itself. But he doesn’t stop there.
He also goes into some different methods of editing in which to get to (or to reach) the same results. John does this because not all images are going to need the same sort of edit to get the needed results. Each image is different in its own way.
I stayed with John the entire way through the DVD, and than many times over and again. He has a way of explaining each technique to the viewer in terms that even I understood. That is no easy task, by the way. There is a ton of great techniques in this multi-DVD and I wanted to learn them all without forgetting any of them. This may very well mean that I will need to delete my entire freshman year of high school from my memory, but this is worth the exchange!
I have often starred at images that contain a radiating warm summer glow, and wondered how it is that the photographer captured it so well in the final image. My mind used to shout out to me that they way to get this is to darken everything else in the image, but I knew that this was not the way.
Well, my hunch was correct. John shows us all how to (only) select the shadows or the highlights of an image and cool them off or warm them up. He also shows ways to select the luminous parts of an image and give them that afternoon glow that I so admired in others images. Little did I know that after grasping only a few easy techniques, that I, too, could now get this look in my own images. What a great DVD set this is.
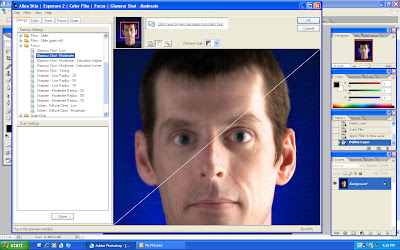
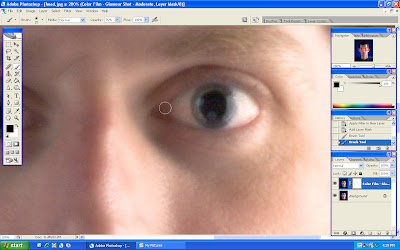
Perhaps this is not the greatest focus of this entire DVD set! Included in the conversations, as he works at editing, are his methods of actually selecting parts of images, and this is gold. Ever spend the entire afternoon selecting a single tree in order to edit it? Well, me too. However, I will no longer be spending the same amount of time performing those edits. John Paul Caponigro shows many time saving ways in which to select different types of items in our images, and how to select them easily and fast!
Then, as if this already is not enough, he not only sheds some light on gradients, but he explains the many different types of gradients in Photoshop, and ways in which to use them wisely as you edit your images. My editing workflow has expanded in technique and reduced in total time.
To sum up this post, not only is this one of my “Must have” DVD’s, but put this one up on the top of your list. This is one of those DVD’s that ranks up there with Vincent Versace and Dean Collins.
I have grown. That is truly how I feel. I have not only learned how to perform some very cool edits, but John Paul Caponigro has taught me what to aim for while editing. He has shown me what is truly possible in digital photography, and how to train my “editing thought process” to look at my images and then pull out all three dimensions.
Remarkable.