When working with images in Lightroom making a quick vignette for them is a snap. It can be just as fast and just as easy to get awesome vignettes using Photoshop too. Here is the method that I use most often, and get great results with.
First, I opened up an image in Photoshop. This is an image that I have shown you before, so let's use this one.
First, I opened up an image in Photoshop. This is an image that I have shown you before, so let's use this one.
 Let's assume that I have finished all work on the image. Vignettes should come last on the workflow list. Each vignette that I do I do separately. I like to make them as custom for each image as I can. Nothing is worse than a "loud" or obvious vingette, plus they are a fast thing to add to an image. With this image open in Photoshop, simply drag the background layer into the copy layer icon, and then you will have a copy of the original layer to work with.
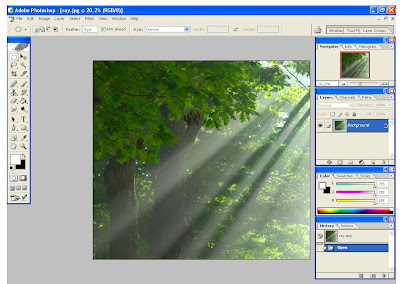 In the layer pallet well, change the layer overlay style, or type, from normal to multiply. This type of overlay as well as "overlay" seem to work best most of the time for vignettes. Your image should turn dark, so stay with me as we will make it look good, I promise!
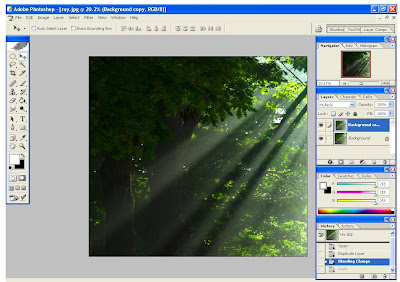 Next, select the elliptical marquee tool, which is in the upper right hand corner of the tools well. A quick note about this tool: If you press and hold down the shift key as you use the elliptical marquee tool you will get perfect circles. If you use just the tool you will get ovals. I used the oval option, or without the shift key, for this particular image.
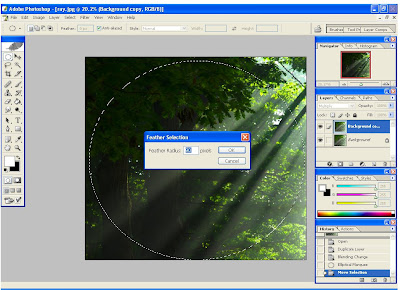
Click and drag with your mouse to create an oval as the image shows. After it has been drawn on your image you can adjust where it lies on the image using the mouse once more. When you are pleased with the placing of the oval, go up, under the "select" heading and choose feather. Enter 90 into the pop up box, and press enter. Doing this "feather adjust" will create a natural gradation for the vignette that you are creating.
 The very next thing for you to do is to press the "Delete" key on your computers keypad. This erases the center of our multiply overlay, leaving the edges alone, or leaving only the information outside of our feather.
 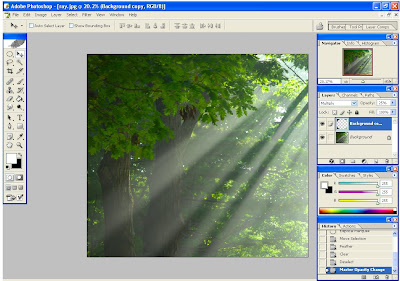 Adjust the opacity of the multiply/feather vignette layer to taste. I usually aim for about 20 percent. Lastly, you can look under the "layer" heading, and choose "flatten image", and save it as a JPEG.
Please, if you have not already, feel free to subscribe to my photography blog now by pressing the "subscriby" button. Thanks, and happy shooting to you!
No comments:
Post a Comment