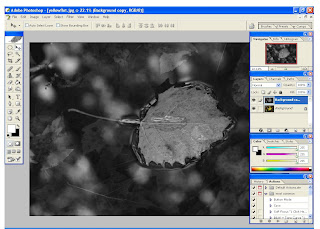
This is the image that I will start todays blog with. It is a single leaf floating in a pond with other leaves below it on the bottom of the pond.
 I should take a second and explain something that Vincent Versace explains in one of his tutorials. He tells us that we should start our editing process with the largest over all fix first, and then work our way to the smaller fixes. For example, if we need to color correct, than that should come first. Removing some acne on a face should come later, as we edit. With that said, lets assume that this image above has been color corrected, and every other major edit has been performed already. We only want to get it to a nice looking black and white with only some "color spots".
Drag the background layer (in the layers well) down and drop it on to the "duplicate layer" icon, which is the square in a square icon. This will copy the background layer, and now you should have two layers. Under the "Image" heading on the top of the software screen, select "adjustments", and then choose "hue/saturation". Take the saturation slider and move it all of the way to the left, or to "-100". You should be seeing a black and white image. We are not there yet, but we are close. The image seems to lack some pop, or lack some true black and true whites.
 Next we are going to dial in the blacks and the whites. This can be done in a number of different ways. I will show you a couple of different ways to do this, here in this blog entry. The different ways that I will show you are perhaps the two most common. Performing both of these on each image that you edit might be overkill. The idea here is to show you a couple of different ways that you can use with any image that you wish to change to a black and white, and then you can find what works best for you.
The first way that I would like to show you, in order to boost the blacks and the whites, is with the levels tool. Click on, and drag the new black and white layer down to the same "new layer icon" in order to copy it to a new layer. Click on the "Image" heading once again and then choose the "adjust" heading, and then click on "levels".
The pop up screen for the levels slider, or the dialog box, is our black and white images' histogram. Move the left (black) slider to the right until it is just under the first bit of black information in the histogram. Next, slide the right (white) slider to the left, until it is sitting just under the first bit of white information in the histogram. You may now move the medium grey slider (in the middle, towards the black and white sliders) to taste, but do so slowly. I have done this step in the image below.
 Now there is something that you might need to do before moving on. If the new (levels) adjustments seem to be too harsh looking, or too intense, then you might want to tone them down a little. You can do this by lowering the "opacity" of the new levels adjustment layer in the layer pallet well.
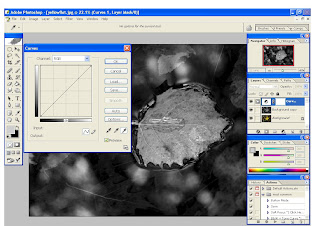
A second way to perform this "poping of the blacks and the whites" step is by using a curves adjustment layer. Imagine if you will, that you did not perform the above "levels" procedure, but instead opted to do it this way, using a curves adjustment layer instead. With the new black and white layer highlit, and not the background layer, simply click on the half white half black circle in the layers pallet well. Choose "curves" from the adjustment layer pop up menu. A new layer will appear after you do this.
What you need to do next is to click on the black eye dropper in the new curves pop up, and then click on the part of your image that is supposed to be a true black. Repeat this with the white dropper, on the true white part of the image, and you can even repeat it with the medium grey dropper too, if you need to. Most of the time I do not use the medium grey dropper. Click "O.K.".
If the new resulting curves adjustment layer is too harsh looking, or intense, you can tone it down by simply adjusting the opacity slider in the layers pallet well. Click on the number, or the percentage showing in number form, and slide it to the left.
Once you are done, it is time to "merge down" the new (curves or levels) adjustment layer. What you need to do here is click on the "Layer" heading, and then choose "merge down". You should see that your newly adjusted (curves or levels) layer has been merged down and combined into the second layer.
Next, it is time to create a layer mask. With the top layer high lit, simply click on the "add a layer mask icon" which is the brown square with the white circle inside of it, in the layers pallet well. This makes the active, or high lit layer a layer mask.
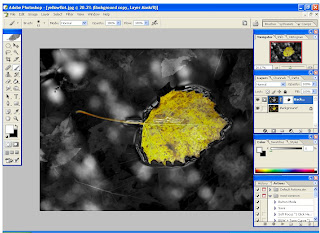
You have just used levels, layer masks, and a curves adjustment layer all in one edit job. If you have never used any of these tools or tasks, take a bow! These tasks are not too hard to perform, but way too many folks are scared to use them, or even learn about them! Practice will bring speed, and a faster workflow.
No comments:
Post a Comment