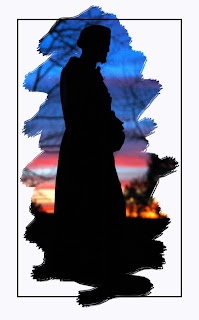
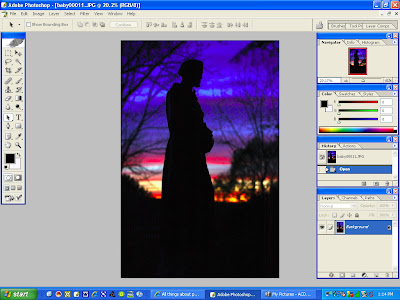
 Here is a rather fast way to achieve this effect, and how to apply it to any of your images. Here is the image that I started with. It is of a statue at almost sunset, causing a pleasing silhouette.
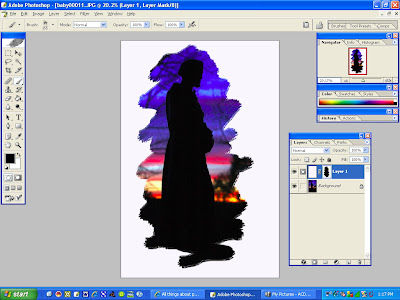
 I am going to use white as a "fill color" to later erase from, in order to reveal the background image. However, you can choose any color you wish, and add effects to it like a gradient. You can choose an exact color using the eye dropper tool and you can even sample a specific color from your image using this same tool. In this example I will use a solid white.
The first step, after you have opened the image in photoshop, is to add a new layer. Do this by clicking on the "new layer" button at the bottom of the layer pallet well.

Next, click on the eye dropper tool icon, and choose any color you wish. With the new layer active, press "alt + backspace" to fill the new layer with your chosen color. You can also use the paint bucket, or "fill" tool to perform this step.
Now, make this layer a layer mask by clicking on the "add layer mask" icon in the layer pallet well. It is the icon that looks like a circle in a square. Next press the letter "D" then "X" to set your active colors to black and white. Choose the paint brush tool, and a spattered type of brush. Make it a large setting on the brush size. Choose black to paint away the white, and white to paint it back into the image.
 Next, I went ahead and added another new layer and chose the square select tool, and put a rectangle around the frame of the image. I then looked under "edit" and selected "stroke". Using a black stroke, I set the width to about 7, and chose "center", all in the stroke tool dialogue box. You can next alter the opacity of the stroke to taste while that layer is active. After you have played with it, and you like the way that it looks, flatten the layers. You can do this by looking under the "layers" heading, and choosing "flatten image". Last of all be sure to save your new creation, and use a thoughtful name!
No comments:
Post a Comment