Sunday, December 6, 2009

Create a composite image in Photoshop

Creating a composite image in Photoshop using different exposures and different white balances in your images.


The concept for this creative shoot was thought out the night before I shot it. As I tried to fall asleep on a couch, with three miniature schnauzers, I thought my way through a challenging and creative image. All that I knew for sure was the fact that I was creating a warm “Christmas card” sort of image with a Christmas tree for most of the background, and the main focus being a young child.

I quickly thought about incorporating a star filter to the Christmas lights in order to create a warm holiday feeling. However, I did not want the star filter to add any distractions or effect to the rest of the image. I also wanted the beautiful decorations on the tree to be sharp and well exposed. Lastly, I needed the child to be well light and full of detail.

I then realized that I would need to take several different exposures, using different white balances throughout, and one exposure would be through a star filter. The lights on the tree would need an “incandescent” white balance (in camera), the rest would get a “flash” W.B. Setting. This is because I would be lighting both the tree's decorations and the child with two Nikon SB28's through umbrellas.

Just as I was about to drift off to sleep I realized that each image would need to be taken from the exact same angle and height. If the camera moved as I shot the images would not line up as I later edited through them. The star filtered image would need a longer exposure too, so a tripod would be employed for the session. I would need to “frame in” the image first, and then not move the camera at all as I took each image.


I also used a Nikon MC-30 remote shutter release just to make sure that the camera would not move at all.


Then I was ready to start taking pictures! First, I shot the Christmas lights-only, with the star filter, set at half a second at F/4, an ISO of 200, and W.B. set to “incandescent”. I turned off all of the other lights throughout the house, and then took the long exposure of just the Christmas tree lights. I didn't care if anything else was properly exposed in this image, since all I would be keeping is the star effect near each light.
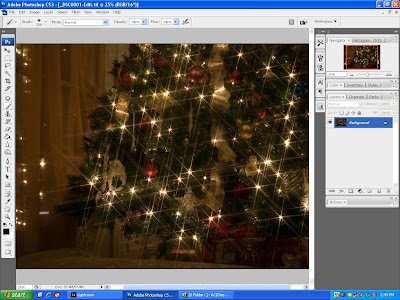
Long exposure, exposed for the lights using a star effect filter.


The second image that I took was of the tree itself, with all of the great decorations. I set up two Nikon SB28's, each diffused with white umbrellas, and each one at about a 45 degree angle from the center of the tree that was facing the camera. I turned off the Christmas tree lights and then took the shot. I shot with the white balance set on “flash”, and at1/60th at F/5 with the ISO set at 200.


This image is exposed for the decorations only.

Next up came the images of the child in her red Christmas dress. I could take as many shots as I wanted, of the child, all with different poses, as long as the camera perspective did not move. I can't stress this point enough, and I will hit on this point at least one more time as I walk you through the editing.
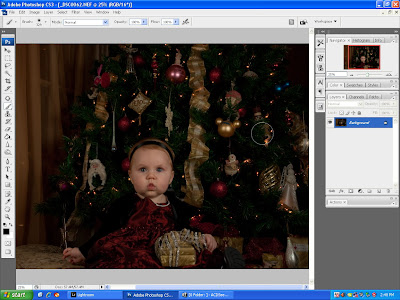
This image was exposed for the Child only, with two flashes.


Again, I used the two Nikon SB28's with umbrellas in order to light the baby. I used flash because I knew that she would not stay still at all. Again, the W.B. was set to “Flash”, and I shot at 1/60th at F/5, with the ISO set at 200. I did not care if anything else exposed, because all that I wanted was the girl exposed.


Once the images were taken it was time to edit them in Photoshop.


First of all I would like to take a second and explain one point. Each image was taken with its own correct white balance which was set “in camera”. However, since I would be comping several different images (of different white balances) into one final image, I will be adjusting each of these images white balance once more in Photoshop using the threshold feature. This is to make certain that the three images match up perfectly in color and then combine to form one great looking composite image.


The first image that I opened was the image that I took of the tree and its decorations. This will become my background image that I will drag and drop other images into. I then doubled the background layer, did a white balance correction using threshold and curves, and that was about it. I like to use the threshold function in order to find the true white and true black in an image, and then I use the dropper tool (in curves) to set them as such. Since this step is done with each image, I will only type “threshold adjustment” from here on out.

Next, I opened the image of the lights through the star filter. I went through the threshold procedure, and then it was time to layer it on the first image. I need these two images to lay exactly on top of each other, so I held down the shift key as I dragged the star filter image onto the background tree image. A new layer opens automatically, with the star filter image on it.


With the new layer active, I created a layer mask and “painted out” everything except the lighting effect over the tree. Layer masks work with painting black and white colors. White “paints in” on the image, and black removes, or “paints out” on the image. Setting the brush and opacity determines how much is removed or placed back; on a layer mask.


I decided to set the layer blend mode of the layer mask layer to lighten in order to allow only the lighter parts to remain on top, and to allow the darker parts of the background image to show through. I also lowered the opacity of the layer mask layer just a little in order to make the effect a little more believable.


Back Ground image after two tree images get merged togather.

Now, if it looks great, flatten the image and save it. Now you can open this image each time, and then do the same thing with each child pose image. Let me explain what I mean.......


In my mind I hoped to get the tree image and star lights image combined, save it, and then simply add each of the different child poses onto this combined, flattened image. I took a lot of child poses, so I shad a lot of work to do.

Painting with layer masks is the fastest way that I know to do this. Forget a natural cut and paste. Cutting around hair is almost impossible to do, and it just looks like a cut and paste job. Besides, what is easier than painting?

Each time I open up and start to edit a new Christmas card image, I first open up the custom background image. Then I open the “pose image” that I will drag and drop onto the custom background. I perform the threshold white balance task on the “pose image” and then drag and drop the “pose image” (holding down the shift tab) into the custom background image. Once more, it will automatically create a new layer for the dropped layer, and this will be made into a layer mask.


“Paint out” all of the image, except for the child, on the new layer mask layer. As for a tip, you can make the layer mask only visible by turning off the background layer. This will show you any of the image that you might have missed. The reverse will show what is behind the pose layer in order to determine what should show through, and what should not.


Layer mask, with the child layer only active.

All that is left is for you to flatten and then save your new composite image. It is just this easy!
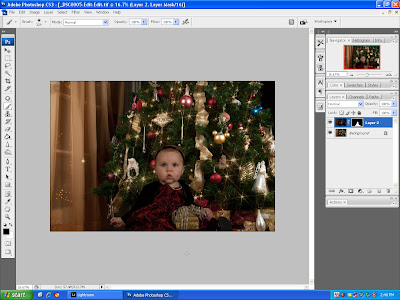
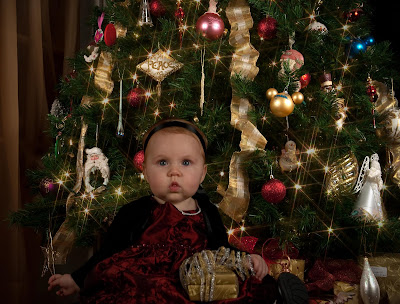
Final Composite image, made from three exposures for lighting.


Playing with the different layer blending types, as you experiment with your own composite images, will prove to be a ton of fun. Don't be scared to try new things as you work, as that is how we all learn!


Pleas take a second and subscribe to the A.T.A.P. Blog right now. You sure don't want to miss out on all of the great information that I like to pass on. Your comments are also always welcome. Thanks for stopping by, and I hope to see you again soon!

Wednesday, November 4, 2009

Recent photo shoot, and a hard lighting lesson learned.

A big thank you goes out to a big family. I was recently asked to photograph these four generational images that you can see in this post. What an opportunity! For the first set of images I gathered the entire group into a local cemetery, and then I got to work. I liked this little bridge with the little white rails, and I was pleased to see it covered with all of the fallen leaves. This would become location number one.


I stood on the back of a pick up truck in order to get as high as I could. I did this on account of the sheer number of participants involved, and also because of how many rows of people I would soon have. My sister grouped the folks together and I made sure that I could see them all through the lens. After that, I made sure that the strobes could in fact light them all, and then I fired away.

I set up three separate strobe units, all of which were Nikon SB28's with pocket wizards as remote triggers. These two pieces of gear seem to work flawless, time after time.

I mentioned at the beginning that I learned a lesson, and here it is.

I knew that if I shot this crowd with a bare bulb set up then the resulting shadows would be intense and hard. I set up two Nikon SB28 strobes, high on stands, and at a 45 degree angle towards each other, and I put on some barn doors just to control any unwanted light spillage. My mistake was that I assumed that by simply adding a third strobe (also with a bare bulb, and centered between the two other lights) that third strobe would help eliminate any over intense shadowing.

What happened was that I got three sets of hard and rather bold shadows! I had umbrellas with me, at the shoot, and I should have used them as diffusion material. Well, I knew as I set up that this might be a problem and thought that I had it covered with the third strobe unit. I was so wrong. Next time, I will add some diffusion!

Without knowing how hard the shadows actually were, I packed everyone up and set out for the second location. By packing up and heading out, I lost the chance to re-shoot the images using some diffusion. I spent hours softening up shadows, and/or removing shadows completely. Do not leave a shoot with out viewing your images at full size. Now I know this.

The second location that we shot at was just down the road at a local middle school. The trees were in full fall color, and all sorts of hardwoods were available for placing the family in front of and/or beside. For this part of the day, I simply bounced the warm afternoon sun right at the clients with a California Sun Bounce.

The California Sun Bounce that I used was a large unit, perhaps four or five feet long, and it lit the entire crowd. My sister worked her magic with the California Sun Bounce as I shot away. The shadows were not as hard nor as intense this time, and the only problem with this series was a white balance issue.

I knew that the white balance would not be perfect because the sun was coming in through the trees, and all of the fall leaves. They had a yellowish tint to them, and the leaves overhead acted like a yellow diffusion sun tent. The clients looked like they had just fallen into a load of cheesy doodles.

As for editing this series of images, I did something a little bit differently. With a fast white balance adjustment in Lightroom, I was fairly accurate. The white balance look was not where I wanted it though, as I stated they were all sort of yellowish and cheesy looking, even after a correct white balance adjustment. So, I added a blue cooling photo filter in Photoshop CS3 and then “WHAMMO”, it was a done deal!

The opposite end of the warmish yellow/orange color spectrum is blue, so I just gave using the filter a shot. I put the blue cooling filter on to a new layer and set it at about 70 percent opacity before flattening the final image.

Saturday, September 5, 2009

Owen and Ariana

Here are a couple of images from my most recent photo shoot. I had the pleasure of photographing these young cousins while at a popular beach spot.


The day could not have gone any better, with great weather and even a mother for a helper. I was also reminded all about the power of patience. Often times I deal with children, as well as pets, so patience is a virtue.


Friday, July 31, 2009

Celina and the Maine bugs.

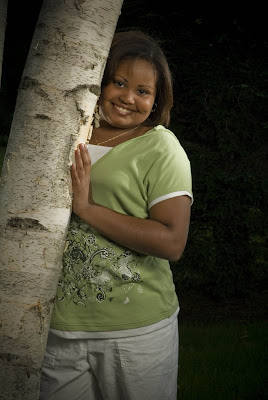
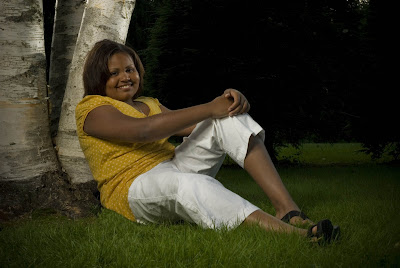
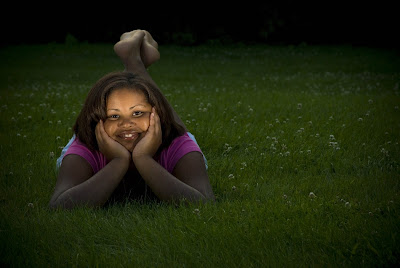
What a great time we all had on my most recent photo session! Celina was my victim in this case, and she had a ball. She wishes to enter modeling, and I am only happy to help her. We met in a local cemetery, set up some Nikon strobe units, and went to town. The pesky bugs came out too, and I am still itching like crazy! Maine and the blood seeking bugs, go figure!


I set two Nikon SB28 flashes behind an umbrella, just to diffuse the harshness from the flashes a little, and aimed it at the prettiness. I played with two Nikon SB-800 , snooted and gridded, to add back, hair, and/or side lighting.


The laying down image needed less lighting overall. It was mid-day sunshine, so only the two Nikon SB-800’s were used. The sun was almost entirely eliminated, in camera, and the flashes were brought in to light only her face. The two Nikon SB-800 flashes were snooted and gridded, and aimed out from 45 degrees, and six feet away.


Thanks to Celina and her family. Thanks for coming by to visit. Feel free to subscribe by typing in your email up and to the right, in the box!

Monday, July 20, 2009

Before and after

Being way too anxious to show you my images, I neglected to allow a way for you to compare with a before and after viewing of the images that I put up last time. Here are the before and the after images for you all.


Before

After

As you can see, I first put in a blue sky. The day was overcast, which was perfect! No shadows and such a great natural diffused light. Next I darkened the back ground mountains, and followed up with the second mountain from the front. This gave it some depth. I burned the foreground as well, as to make it less distracting to the eye.

Next, I added some cool and warm hues to the rocks just to add depth as well as lighting details.


Before

After


Sunday, June 28, 2009

Making portraits using just one light source.

With all of the recent action on the web dealing with photographers exploring portrait sessions in which only one light source is used, I figured that I would show some of my recent work. Strobist has been running/posting a very cool series on this very subject, and a lot of people have been responding to it.

When I set out to capture portraits using only one light source, two different things usually come to mind. First, I (most often) will bounce in light against (or aimed at) the initial lighting source. This adds fill lighting on the subject. Technically, only one light is used but it does come from two different directions. This helps to remove any unwanted harsh shadows.

The second thing that comes to mind when using only one light source in portraits is getting a harsh, almost extreme shadow. Here are some examples of both versions of “one light portraits”, and all taken this weekend.

On this occasion I set up the lighting in a very easy to set up, and easy to use manner. I placed two Nikon SB-28 strobe units onto one adjustable lighting stand. I topped them off with an umbrella just to provide a larger lighting surface in order to diffuse the light coming from the two flash units.

Fill lighting was supplied using a simple silver reflector, which bounced the strobes initial light back at the subject. Pocket Wizards were employed, for the first time, and I must write a nice big “thanks for the gear loan Scott, over at Weekly Photo Tips”!

With the two strobes, Pocket Wizards, Quantum Battery pack, and an umbrella all on one stand, I found it was simple to move the “kit” around to any spot that I wanted, and it was just as easy to “aim the strobes and then shoot”.

The set was also done in a simple way. I placed a sheet of black muslin onto a backdrop stand, and then placed a desk under (and in front of) the muslin and the stand. I draped the muslin over the top of the desk to make for a large black background. A pillow and a blanket were hidden under the muslin, on top of the desk, for the child’s safety.


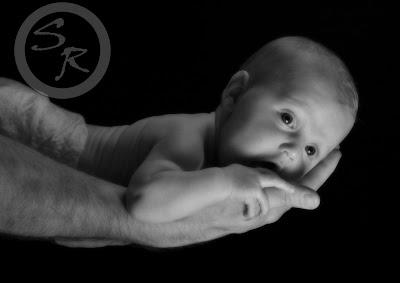
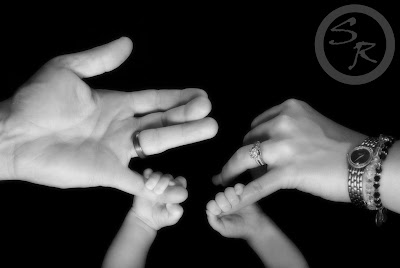
In the above image the light stand was placed low, and just in front of, the desk. Next, I placed the silver reflector above the desk, just above where the hands were going to be. The reflector was aimed back at the strobes in a way that light would be reflected back into the place where the hands were going to be. I asked Mom and Dad to each provide a finger for the child to grip onto and the baby just did what she thought was natural. Perfect!

I placed a black out card/reflector between the back of the strobe stand and the camera, just to make sure that there wasn’t any unwanted light entering the lens.


This image was done in the exact same set, using the same lighting and reflector. I love how the baby is gripping the hand of the father. She is so cute.


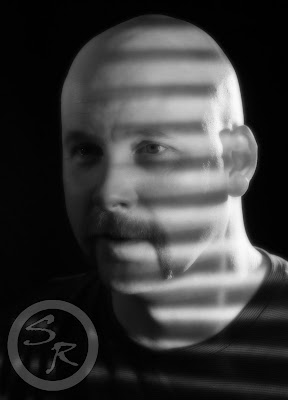
Here is what I meant by a harsh, contrast rich shadow with a half lit face. This was accomplished by placing a set of blinds between the strobe (bare flash with a snoot) and the subject. I also used a second light just to add some light to the right side of his head. So, two light sources and a reflector was used for this image, not one. I took this image just for this blog post, but it seems to be growing on me.

Well, thanks for stopping by. Feel free to subscribe to “All Things About Photography” by simply typing your email into the box! That is just to insure that you never miss a post. Comments are also always welcome!

Thursday, June 18, 2009

Summertime, and HDR images.

With the summer season comes so much for us all to do. Slowing it down (or even stopping) every once in a while to smell (or photograph) the flowers is a must.

One image that I took several years ago of wild lupines has done rather well for me in stock image sales. I have not sold a bunch of copies, but it holds the highest sale price recieved out of all of my stock sales. I still ponder about just who purchased it, and where it has ended up. Maybe someday I will notice the image somewhere special.


So, stopping the car and getting out to photograph a field of lupines just seemed like the right thing to do at the time. “Istock images” actually allowed one of these lupine images to be listed, which is getting harder and harder to accomplish. So many folks try to get their flower images listed that “Istock images” has quickly filled up with them, and they have since grown tired of such images.


Lengthy exposures

I spent this past week impersonating a mechanic. The salt that gets spread on the winter roads here in North American sure does a good job at eating away floorboards. After taking the seats and the carpeting out of my car I started to grind away on some metal. I would rather be shooting images.


So, I took some time away from the grinding to do some HDR work. One image is called “Blue Doors” and can be found in the town in which I live. It just begs to be photographed each time I pass by. Cape Porpoise is the location for the second image, which is where I often go to get inspired.